Practices for playing a draw: the complete routine, from the practice range to the course
These exercises for playing draw They teach you how to produce a right-to-left trajectory (for a right-handed golfer) methodically: by controlling the ball's launch, the club path, and the clubface at impact, without ever forcing the ball with your hands. You will achieve a moderate and repeatable draw, directly transferable to the course.
From the driving range at Golf du Belvédère, we've observed the same pattern in 2026 among the majority of amateur golfers who come to work on their ball flight: they try to "spin" the ball with their hands instead of building the draw from the club path and the clubface. The result: an unstable shot, sometimes a hook, rarely a true, repeatable draw. The exercises below correct this reflex step by step.
In this article, you will follow a clear routine: understand → feel → repeat → stabilize. Each exercise is designed to help you avoid the classic mistake: forcing your hands instead of building a clean draw.
Expert advice: Film two swings from the front and two from the side before the session. You'll compare them at the end: it's the quickest way to measure real progress, without relying solely on feel.
Table of Contents - Exercises for playing draw
Before we begin: what these exercises should produce
A "controlled" draw is not a ball that spins excessively to the left. It's a trajectory that starts slightly to the right (for a right-handed player) and gently curves back towards the target.
- Priority #1: the club path (in-to-out).
- Priority #2: a face that is not open in relation to this path.
- Priority #3: centered contact, otherwise the curvature becomes unstable.
Useful equipment for training
Nothing sophisticated is needed for these exercises; in fact, that's one of their advantages.
- 2 alignment sticks (or 2 clubs placed on the ground) for starting and path markers.
- A few tees for practicing a stable face.
- A 7-iron to start with, more forgiving than a driver or a wood.
- Ideally, a covered or outdoor practice area with visible targets to measure dispersion.
If you want to invest in some suitable small training equipment, you'll find it at Belvédère Golf Proshop.
The 6 exercises, from the practice area to the course
Exercise 1: The starting lane (start control on the right)
Aim : learn to start the ball a little to the right without pushing it or slicing it.
Place two sticks on the ground: one on the target line, the other two to three degrees to the right. Your goal: to get the ball into this "right-hand corridor". Don't try to make it spin yet; just find the starting point.
Reference point: If it veers too far to the right, the face is too open at impact. If it veers straight but turns, you might be compensating with your hands.
How many balls: 10 to 15 balls, checking the start ball by ball rather than chaining them together without looking.
Exercise 2: Type around 4 o'clock (in-to-out path without forcing)
Aim : create a natural in-in-out path. Imagine a clock on the ground: the target is at 12 o'clock, you want to feel the club move towards 4 o'clock (right-handed).
Take 5 practice swings without a ball, finishing around 4 o'clock. Then 10 shots at 50% speed: same feeling. Maintain a balanced finish: if you "fall" over, you're forcing it.
To avoid: exaggerating to the point of locking the hips or "throwing" the arms, the path should remain a consequence of the body, not an isolated arm movement.
Exercise 3: The ball above the tee (stable face)
Aim : Stabilize the face at impact, especially with the driver. Many players create the path, but the face remains open: the result is a slice or a push.
Place a tee 5 cm in front of your ball, on the target line. Objective: to hit the ball and graze/knock off the tee after impact. Hit 8 balls at medium speed.
What this develops is a "through" shot, not a "sliced" shot. It's often the exercise that most quickly unlocks the potential of players who have been slicing for a long time.
Exercise 4: Clean 1/2 swing draw (pedagogical progression)
Aim : Learn the draw without getting lost in a full swing. You will create the curve in control, then increase the amplitude.
Start with a half-swing (arms horizontal). Goal: a slight and repeatable curve. Do 3 sets of 6 balls.
Only then should you move to a three-quarter swing. If the ball over-spins, return to a half-swing: this is your reset. This back-and-forth between a reduced and full swing is normal; it's part of the learning process, not a failure.
Exercise 5: Stick outside (visual anti-slice)
Aim : prevent the out-to-in movement that causes slice/pull.
Place a stick on the ground slightly outside your swing line (ball side). The goal is to avoid touching the stick during the downswing. Hit 10 balls with a 7-iron.
Indicator: If you touch the stick, you'll come back "over". If you avoid it but push, adjust the face (not by twisting your hands, but via the grip and setup).
Exercise 6: Draw in 3 targets (transfer to the path)
Aim : Transform the exercise into a real strategy. You will aim at a target, but choose a starting point, then let the ball come back.
- Final target: the flag (or a marker on the practice range).
- Starting point: 5 to 10 meters to the right (right-handed).
- Curvature zone: You accept a gentle curve, not a big hook.
Make 9 shots: 3 shots «small draw», 3 shots «standard draw», 3 shots «controlled draw» at reduced speed.
Adapt the exercises to your level
These 6 exercises work for all levels, but the slider to adjust changes depending on your experience.
- Beginner / high index: Focus solely on drills 1 and 2, using a 7-iron at a reduced speed (60-70%). Don't focus on the curve yet: first master a consistent ball launch.
- Intermediate player: Complete the 6 exercises in order, respecting the indicated repetitions. This is the fitness level for which this routine is designed.
- Experienced player / low handicap: Reduce the number of balls per exercise but add a dispersion constraint (target 15 meters wide instead of 40) and integrate exercise 6 from the warm-up.
If you're a complete beginner or want personalized feedback on your swing, coaching with a professional remains the fastest way to correct a club path or an unstable clubface; this is precisely one of the points addressed in private lessons at the Belvedere Golf School.
20-minute routine: your typical workout
- 5 min: starting lane (exercise 1)
- 5 min: In-to-out path (exercise 2)
- 5 min: half-swing draw (exercise 4)
- 5 min: Draw in 3 targets (exercise 6)
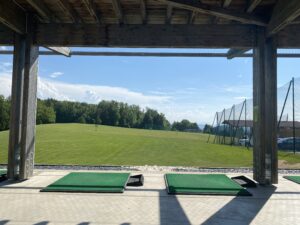
Expert advice: If you are practicing at the Belvédère Golf driving range, take advantage of the open areas to work on dispersion on exercises 1 and 6, where clearly seeing where the ball lands makes all the difference.
Find the practical information for Belvedere Golf practice to organize your next session.
The 5 mistakes that sabotage your exercises
- Wanting to "spin" the ball with your hands : correct by the path and the face, not by a flick of the wrist.
- Aiming too far to the right and pushing the ball : work on controlled starts, not exaggeration.
- Perform a "hooked" draw« : reduce the amplitude, return to the half-swing.
- Change 3 settings at once : only one focus per series (path OR face OR contact).
- Never test on the course : use "draw in 3 targets" to transfer.
Common mistake: The number one pitfall remains trying to "spin" the ball with your hands to force a more pronounced draw. It's this reflex, more than any other, that transforms a controlled draw into an unpredictable hook.
At what point should the draw be introduced on the course?
Many golfers wait until they have a "perfect" draw on the driving range before daring to try it on the course. In reality, the right approach is the opposite: test it early, but only in low-stakes situations. A driving range will never fully replicate the pressure of a real tee shot, and it is precisely this pressure that reveals whether your draw is truly stable or simply acquired under comfortable conditions.
First, choose a clear hole, without any direct obstacles in the shot path, to attempt your first draw in a real game situation. If the hole curves to the left (dogleg left), it's even more effective: the draw naturally follows the shape of the fairway and gives you a real strategic advantage rather than just a stylistic exercise. Note the results of your first 3 or 4 attempts on the course: starting direction, resulting curve, and feel at impact.
Over time, this field test becomes a reliable indicator: a draw that holds up under pressure, on a real tee, with the stakes of a scorecard, is a truly mastered draw. A draw that only works on the practice range, without pressure or consequences, remains a useful technical exercise but not yet a playing tool.
Conclusion: a simple progression, from practice to the course
These draw drills provide a simple progression: controlled start → in-to-out path → stable face → transfer to the course. Maintain a moderate curve: a draw in golf «"Clean" is a repeatable draw, not a spectacular shot.
Plan 2 practice sessions this week with the 20-minute routine, then test on the course with 3 tee shots in "3-target draw".
Want to accelerate your progress with an outside perspective?
The Belvedere Golf School offers courses adapted to all levels, in Saint-Martin-Bellevue near Annecy.
FAQ: Exercises for playing draw
Can I do these exercises with all clubs?
Yes, but start with a 7-iron (easier). Then, only test with a wood or driver once the iron is stable.
Which exercise is most useful for transferring to the course?
The "3-target draw": final target + starting point + curvature zone. This is what transforms a mechanic into a true game strategy.
What is the best exercise to learn how to play draw?
The most effective is the starting corridor: you first control the starting direction, then you add a slight curve.
How many balls do you need to hit to stabilize a draw?
Aim for 30 to 50 shots per session, but with a clear objective (tee, path, face). Thirty well-targeted shots are better than 100 aimless shots.
Why do my exercises end in a hook?
Because you're closing the face too early or over-correcting the swing path. Go back to a half-swing and aim for a gentle curve.
Do you need a teacher to make progress on these exercises?
No, these exercises are designed to be done independently. But if the drawing doesn't stabilize after several sessions, an outside perspective can often spot in a few minutes what would take weeks to correct alone.